From Local Script to Cloud Logic: Porting Python to engicloud.ai
.png)
From Local Script to Cloud Logic: Porting Python to engicloud.ai
You have a Python script that works perfectly on your machine. Now, you want to share it, connect it to other engineering tools, or wrap it in a professional UI. This is where engicloud.ai comes in. In this guide, we’ll take a standard Python snippet and "port" it to an engicloud calculator in few simple steps.
The Starting Point: Standard Python
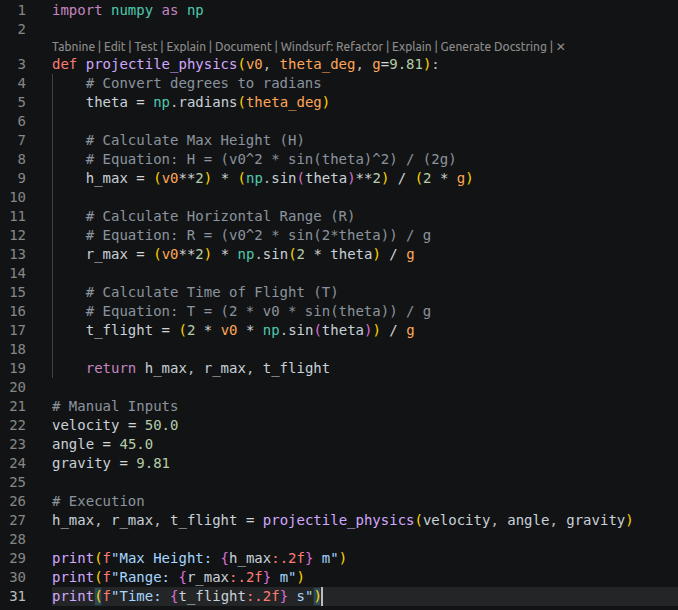
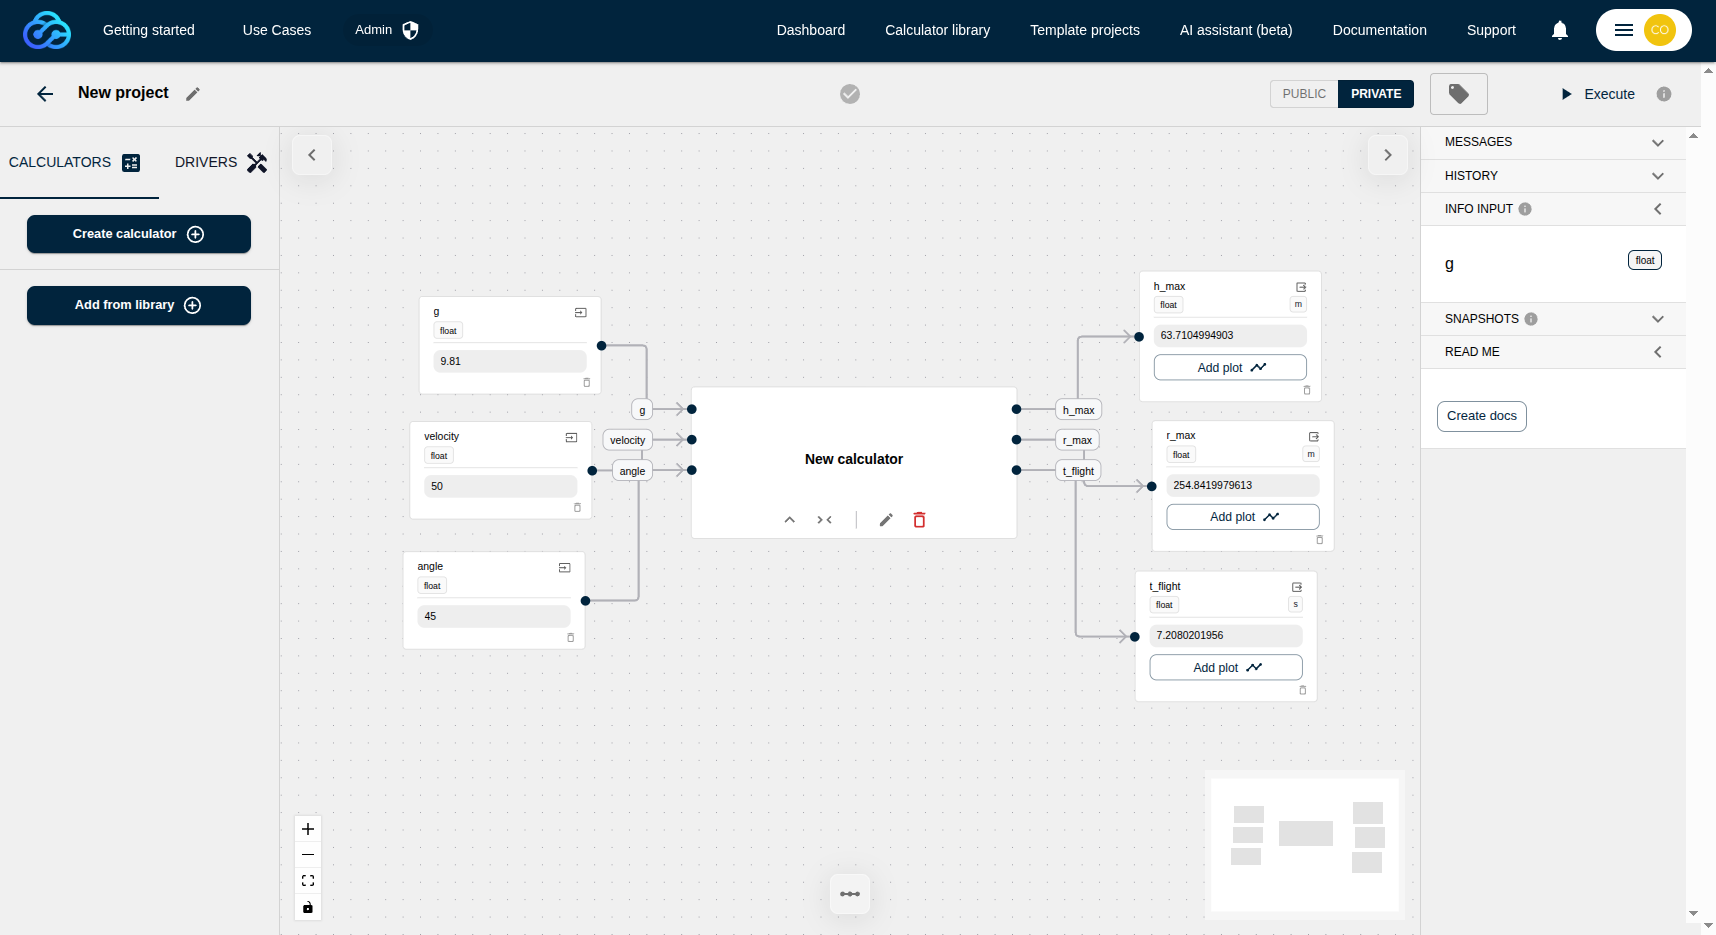
Let’s port a standard projectile motion script to the platform. The code takes the initial velocity, launch angle, and gravity as inputs, and calculates the maximum height, horizontal range, and time of flight of the projectile.
Create the Calculator Shell
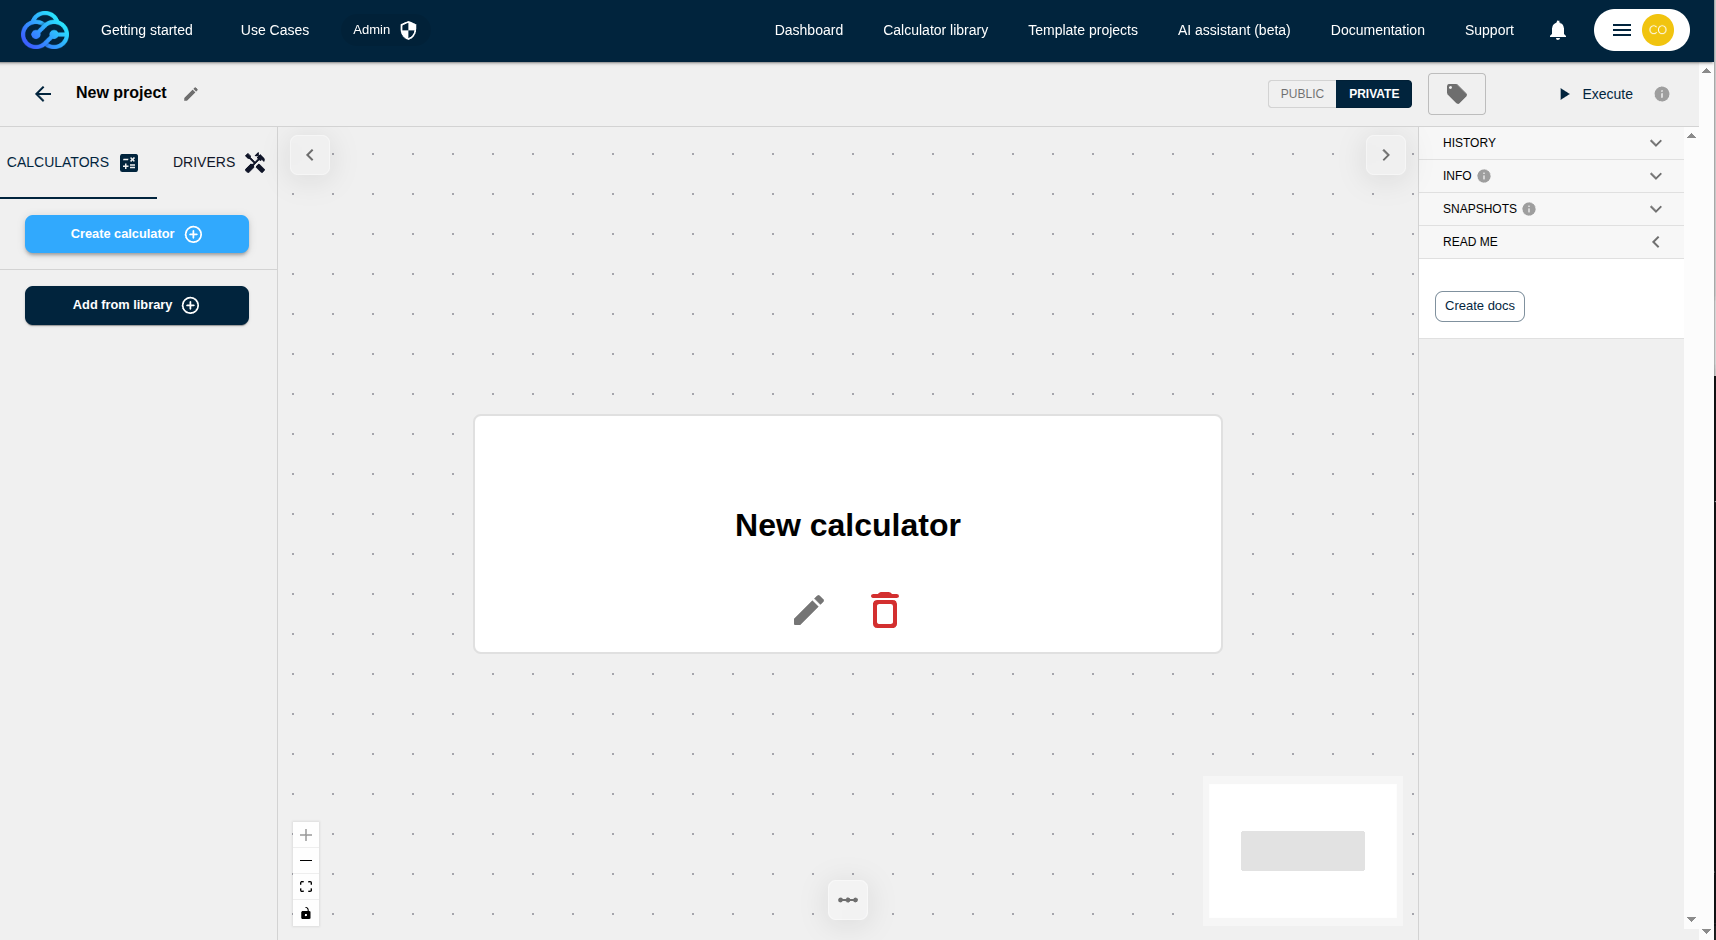
First, log in to engicloud and open a new project. Now create a Calculator onto your canvas.
Implementing Platform Inputs and Outputs
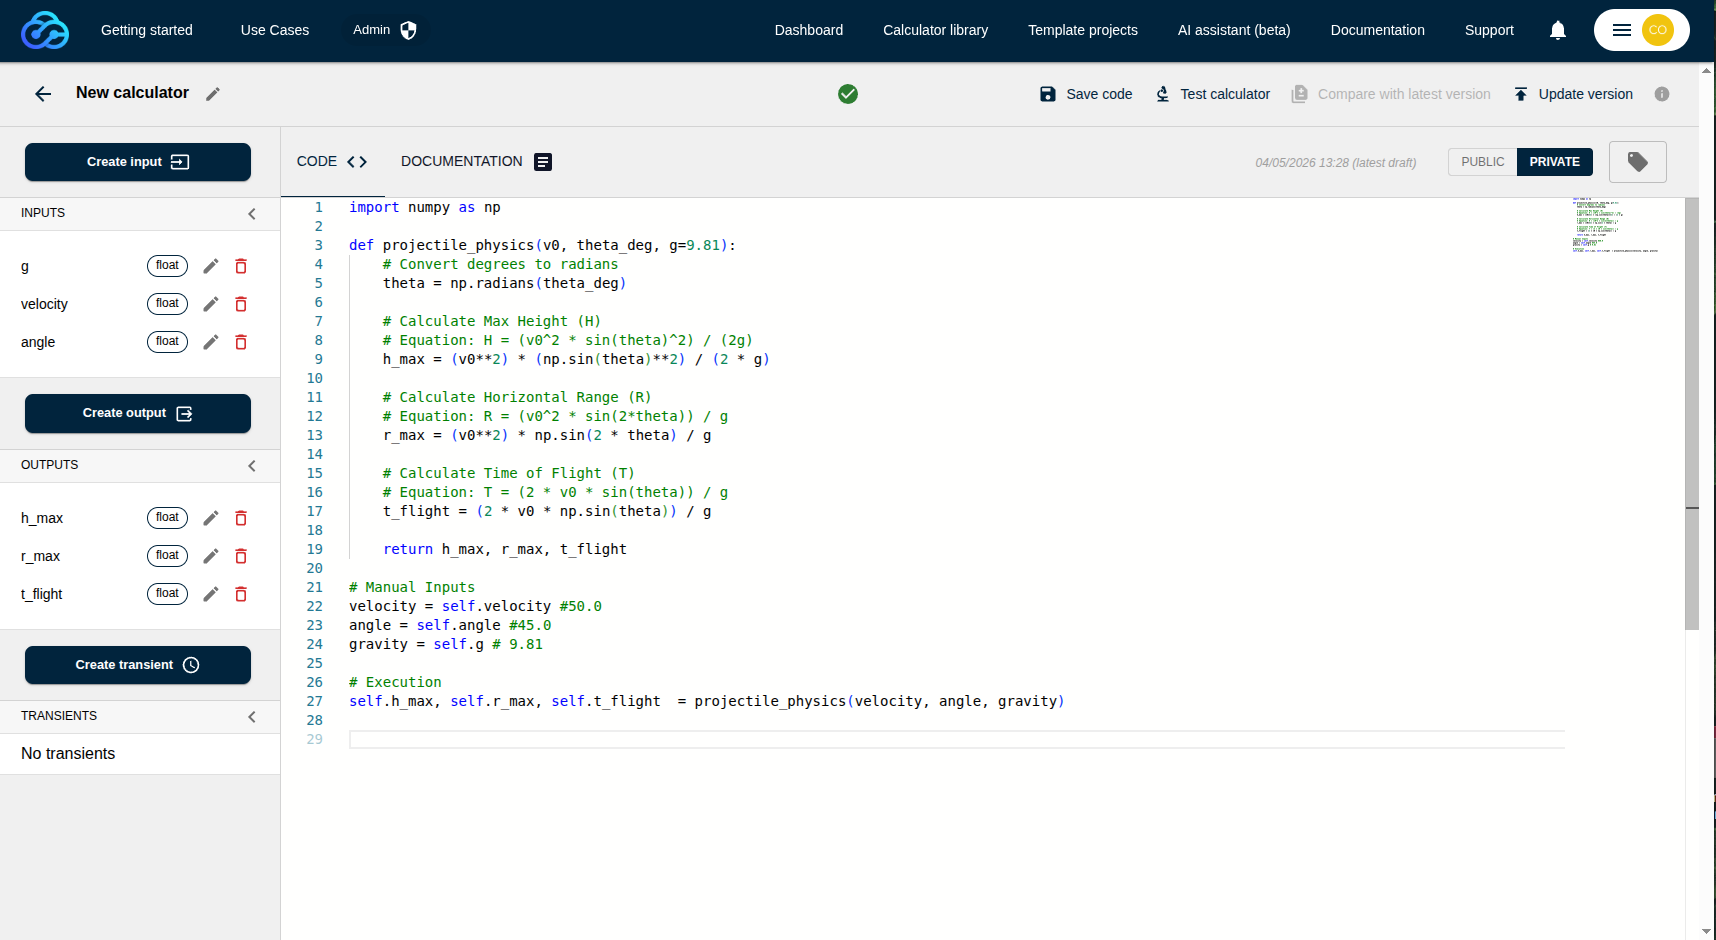
Now, open the Calculator Editor on the engicloud canvas and paste your original Python code. To make it work in the cloud, you simply need to connect your logic to the platform's interface. In a local script, you use static variables (like velocity = 50). On engicloud, the platform injects data from the UI into your code using self.velocity, self.input, and so on. Similarly, instead of using a print() statement that only shows up in a console, you assign your results to self.output to make them visible on the dashboard. By making this small change (replacing static variables with self.input/self.output), you have turned a simple script into a reusable engineering component.
Fast-Track with AI
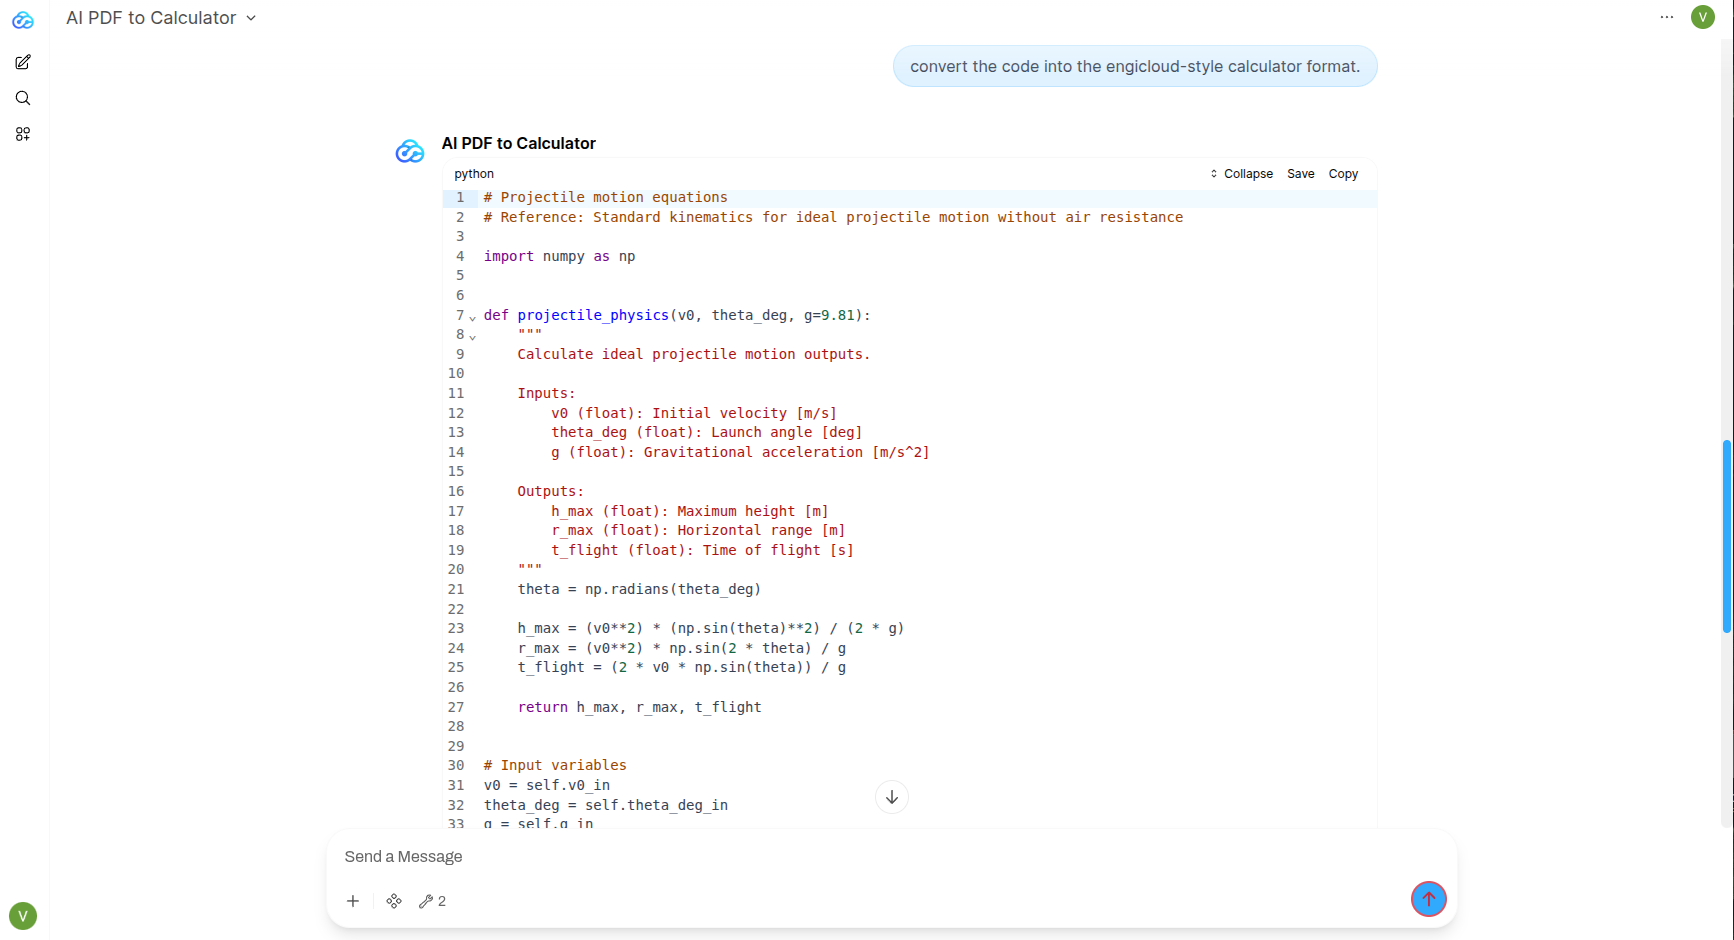
You don't have to map these variables manually. You can paste your local script into an LLM and ask it to convert this to engicloud format by providing the engicloud.ai documentation as reference. Even better, the AI assistant directly on the engicloud platform can do this for you. Simply copy and paste the standard Python code and ask the assistant: "Convert this code into the engicloud-style calculator format." It will handle the self. mapping in seconds.
Execution
Once the code is ready, simply navigate back to the Project Canvas and hit the Execute button. When you trigger the execution, engicloud.ai processes your logic in the cloud and instantly updates the project state.
You have successfully moved from a "dead" local script to a living engineering asset. Your Projectile Motion model is now a professional, interactive tool that can be shared with team members or used as a modular component in much larger, more complex simulations.